Dec 29, 2012

Nutella & Strawberry Crepes


During my Junior year of college, I was lucky enough to spend a month studying abroad in Europe. England, France, Austria, Switzerland, and Germany...Oh how I'd loved to go back, and fully intend to for my husband and I's overdue honeymoon in 2013! During my travels, I discovered my deep love for crêpes. Sweet crêpes, savory crêpes, fruit filled crêpes, and breakfast crêpes...delicious! When I returned to the states, I missed them terribly. Much to my surprise, one of my roommates knew how to make them...salvation! I of course took note of the recipe and tweaked it to my liking. Basic crêpe recipes are all pretty much the same, you really can't go wrong!

Sweet Crêpes
2 large eggs
3 tbsp melted unsalted butter
3/4 cup 1% milk
1/2 cup water
1 cup white flour
3 tbsp white sugar
a few dashes cinnamon

Toppings & Filling
Nutella
fresh strawberries
powdered sugar

In a medium sized bowl, combine eggs, melted butter, milk, water, flour, sugar, and cinnamon. Whisk together until well combined and flour lumps are smooth. Refrigerate the mixture for about 30 minutes to allow bubbles to settle.


Preheat a medium frying pan over medium heat. When your mixture has settled, transfer it to a measuring cup. Should be almost 2 cups worth of batter. VERY IMPORTANT: Spray your pan EACH time before you pour a new crêpe, it will stick otherwise. Once your pan is hot and you have sprayed your pan with cooking spray, pour a small amount of batter into the pan. Immediately roll the pan in a circular motion to thin out the crêpe, keeping a circle shape as much as possible. Crêpes should be very thin, not thick like a pancake. Cook your crêpe for about a minute to a minute and twenty seconds and then flip. The crêpe should be a light golden brown before flipping, if not, give it a little more time until it is. Once flipped, cook for another minute and then transfer to a plate. Repeat the process until you run out of batter, spraying the pan each time before pouring a new crêpe. If your first crêpe tears, don't worry. It may take you one or two tries before you get the hang of it. Heck, I normally have one or two scrap crêpes before I get it right!


Allow your crêpes to cool before spreading your Nutella, otherwise it with be very runny and messy! Spread a thin layer of Nutella on each crêpe, add a few diced strawberries, and roll up like a burrito. Once rolled, top with another thin layer of Nutella, diced strawberries, and a sprinkle of powdered sugar. Enjoy!


Dec 28, 2012

HANAair Professional Hair Dryer {Product Review}


My hair can be a nightmare sometimes. If you feel the same, keep reading!

My hair is an anomaly. I'm a natural blonde, but I dye my hair black. I have naturally curly/wavy hair, but I love straightening it. I like my bangs on the left, they like to go to the right. No wonder it likes to gives me hell!

My hair is pretty long, as you'll see in the pictures below, so most mornings when I fix my hair, it takes a good hour at least to dry and style it. I get so tired of spending so long on my hair in the mornings. To cut the time down, I'll usually wash and dry it at night, sleep on it, then style it in the morning. It saves time, but it sucks waking up with crazy, frizzy, slept-on hair. THEN I have to spend more time than I normally would straightening or curling it. Why!?! I'll tell you why. It's because I'm a cheap-o and buy $25 blow dryers! I've been telling my husband how much I hate my hair dryer and have been meaning to buy a nicer one, but the budget has been tight because of the holidays, so I made do.

Well, the big man upstairs must have known I really needed a new hair dryer, because a few days after mine broke (aka you have to hold it a certain way for it to actually blow air), I received an e-mail from Misikko asking me to review their HANA Air Premiere Hair Dryer! Uhhh, a free hair dryer worth over $300 in exchange for my honest opinion...it was a no brainer. A few days later my HANA box arrived packed full of goodies! Just look at everything they send you!

My package included: Hair dryer, straightener protective travel case, eyelash curler, brush, soap roses, hand sanitizer, emery boards, Godiva chocolate, and a teddy. 
I put my new hair dryer to the test the very next day. Its contender? A $25 Revlon 1875 Ionic Ceramic piece of....


For a professional dryer, the HANA Air Premiere Hair Dryer wasn't super heavy, but definitely heavier than my Revlon. The buttons were similar: Off, Low, High - Off, Warm, Hot - Cool. What I love about the HANA Air is the Cool button, it's an ACTUAL button. You don't have to hold it down to get the cool air. Once you push it, it stays cool until you push it again. Awesome! Also, the Hot setting on the HANA Air isn't scalding hot like my Revlon. Seriously, you could burn your scalp with that thing!

Okay, so the packaging = awesome, the hair dryer = sleek and easy to work, but what about the results = ?

For the test, I used both dryers under the same circumstance. Towel dried hair, no product, and dried with a flat and round brush. The results...incomparable!


In the left image I used my Revlon and in the right image my new HANA Air, what a difference! Now, I wouldn't say that my hair is leave-the-house-ready after using the HANA, but again my hair in an anomaly and very difficult. I would be more likely to leave the house after just drying it with the HANA over the Revlon. Overall, the HANA saved me about 8 minutes of drying! That may not sound like a lot, but because my hair dried in such better condition, it will also save me time when styling. Double whammy!

Moral of the story: this is one awesome hair dryer, and if you're looking to upgrade and make an investment in your hair, the HANA Air is the way to go! They'd even make wonderful holiday gifts for the beauty enthusiasts in your life.

Thanks again to Misikkio for the fantastic new hair dryer, you've saved me so much time and my hair looks great!!

*I received the HANA Air as a gift from Misikko, but was not compensated for this post. All stated opinions are my own. 


Dec 20, 2012

Instagram Link Up!


254 photos (and counting)  in 31 weeks…yup, I’m addicted to Instagram. I can’t be the only blogger out there addicted, right?! Of course I’m not silly heads! I follow a lot of you already and I love, love, love getting a small glimpse of your daily lives. It just makes my heart smile to see all of your happy pictures! I love it so much that I want to follow as many of you as possible, which is why I am hosting an Instagram link up today! Link up your Instagram page here and follow other bloggers like you!

Your Instagram web address will appear like this (instagram.com/your username here) If you’re unsure of your Instagram web address, go to Instagram.com and type this link in with your username following the forward slash to test it out. You will need to enter your link for the party like this (http://instagram.com/your username here).

Let's start linking! Please be sure to follow my account (instagram.com/audrakurtz) I will be the first link in the party =] You can also spread the word to others by posting a picture and hashtag is with #TKCInstagramLinkUp. Search for the hashtag to find others who are linking up and follow them! Have fun!


Dec 18, 2012

Merry Christmas From The Kurtz Corner!


The Christmas crafts and baking are coming to an end as we prepare to make our rounds around Texas to visit our families. I've seen lots of your Christmas decorations, but I haven't shared any of mine, so I figured I'd share a few photos from our home this Christmas! This is our first Christmas in this house since we moved in New Years eve last year. I didn't get to go crazy this year with decorations since we had to buy all brand new lights for the house (super expensive!) and enough ornaments to fill a 9ft Christmas tree (also expensive)! Next year, I hope to add lots of cute decorations to what we already have =]

I hope everyone has a very Merry Christmas and a wonderful New Year! I pray that you keep the true meaning of Christmas in your heart, and if you have never heard the true story of Christmas I hope that you will take some time to read it! You can find scripture relating to Jesus's birth in the New Testament of the Bible - Matthew 1:18-25; Matthew 2:1-12; Luke 1:26-38; Luke 2:1-20.

A few pictures for the Kurtz house!


It wouldn't be Christmas without a silly picture
Merry Christmas from The Kurtz Family!


Dec 17, 2012

Tuesday Tutorials Link Party {No. 53}

Tuesday Tutorials Link Party {No. 53}
Welcome to the party! Link up your tutorials, cooking, crafts, sewing, DIY tips & tricks, I want to see it all! After each link party I will feature my favorite tutorials from the previous link party, so check back to see if you've been featured! I feature several posts on {The Kurtz Corner FB Page} and pin your projects to my Tuesday Tutorials Link Party Pinterest Board so make sure you become a fan/follow me on Pinterest and check it out!

Come Visit Me!


Features!

DIY Stenciled Picture Frame from The Winthrop Chronicles
Cozy Cup DIY Light Strand from Quinton Wench
 
DIY Printed Candles from Eyes on the Source


Only Four {Easy} Rules
1. Please be a follower of {The Kurtz Corner}
2. Link directly to your post, not your blog
3. No Etsy Shops, giveaways or personal link parties 
4. Please grab my button or use a text hyperlink & link back to my blog 
Please follow the rules, it's only fair & good blogging etiquette :)

Party Button


Dec 10, 2012

The Best Chocolate Chip Cookies...Ever


I have a really hard time choosing favorites. So, when I say these are the best chocolate chip cookies ever, that's really saying something! Seriously, I can't commit to picking favorites of anything, but if I had to pick one cookie to eat for the rest of my life, these would be my choice! These cookie are the perfect balance of chewy, soft, sweet and salty. I promise you will not be disappointed!

The Best Chocolate Chip Cookies...Ever
makes 24 medium sized cookies
--------------------------------------------------------- 
Ingredients
1 1/2 c all purpose flour
1 tsp baking powder
1 tsp baking soda
1/4 tsp salt
1 c cooking oats
3/4 c semi-sweet chocolate chips
1/2 c brown sugar
1/2 c white sugar
1 egg, slightly beaten
3/4 c butter, melted
2 tbsp honey

Directions
Preheat oven to 300 F. Combine all dry ingredients in a large bowl. Add the slightly beaten egg, melted butter, and honey. Fold ingredients together with a rubber spatula or wooden spoon until well combined. Place medium sized balls of dough on a baking sheet. I recommend using a Silpat to keep the cookies from burning. I also feel that the cookies bake better when using a Silpat. Bake for about 10 to 12 minutes. Remove from oven and lift Silpat with the cookies still on it on to a cooling rack.


This recipe was passed down from a friend and has been slightly modified from the original.

Dec 5, 2012

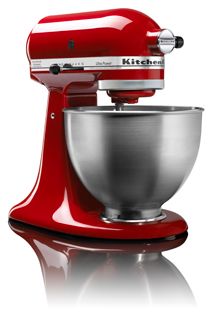
Win a KitchenAid Stand Mixer!!!


Win Me!!!

Oh boy do I have a fun giveaway for you! Just in time for all of your holiday baking, eReplacement Parts is giving away a brand new, beautiful, KitchenAid Mixer! You even get to pick the color! Entering is easy - All you have to do is write a post on your blog (or revamp an old one) about a DIY project you’ve done. Readers can vote for your entry once a day by clicking the “Vote for Me!” HTML button that you’ll insert into your blog post. Then, the most popular tutorial wins the mixer! This contest will end on Wednesday, December 19th.

Once you have completed your post, placed the button in the post, and you are ready to enter, head to this page and click the pink “Enter Now” button. Email eReplacement Parts the URL of your blog post and your name, and they will add you to the poll so that you can start earning votes! You can promote your post however you like – so go nuts!

In order for your blog post to qualify, it must meet the following criteria:
  • List of materials needed for the project
  • Price for the items and project
  • Step-by-Step Instructions
  • HTML “Vote for Me” button

Here is the code for the button:


Best of luck to everyone!!

Dec 2, 2012

Candy Cane Cake Batter Cookies


I just love holiday baking, don't you? Candy canes have always reminded me of my childhood Christmas. I remember my mother would buy the boxes of candy canes and we would hang them on the tree. For a month straight, I would occasionally sneak a candy cane off the tree as a treat. Funny how the littlest things remind us of our childhood, huh? Well, I wanted to bring a little of that childhood back to life, and into my holiday baking! Once a year, Hershey's sells the candy cane kisses, a perfect little addition to my cake batter cookies!

Candy Cane Cake Batter Cookies
makes 24 cookies
---------------------------------------------------------
1 cup flour
1 cup yellow cake mix
1/2 cup unsalted butter, softened
1/2 cup white sugar
1 teaspoon almond extract
1/4 teaspoon salt
3 tablespoons milk
24 candy cane Hershey's kisses

Preheat your oven to 375 f degrees. Beat together your softened butter and sugar using an electric mixer until well combined. Add cake mix, flour, salt, almond, and mix thoroughly. Add 3 tablespoons of milk or more if needed to make a dough consistency. Chill dough for one hour. Roll out dough and cut with a circle cookie cutter (about 1.5 in diameter). Place one Hershey's candy cane kiss in the middle of each cookie and roll in to a ball. Place onto a baking sheet. I like to use a rubber baking mat so that the bottoms don't burn. Bake your cookies for 11 minutes. Transfer to cooling rack. Enjoy!